How Dr. Bonilla
Rebuilds an Ear
This page walks you through the complete surgical process in detail — from the moment the rib cartilage is harvested to the final elevation that gives the ear its natural projection. Understanding what happens in the operating room helps families feel prepared and know what to expect at every stage. For a broader introduction to microtia and how we approach it, visit Dr. Bonilla's microtia center at Microtia.net.
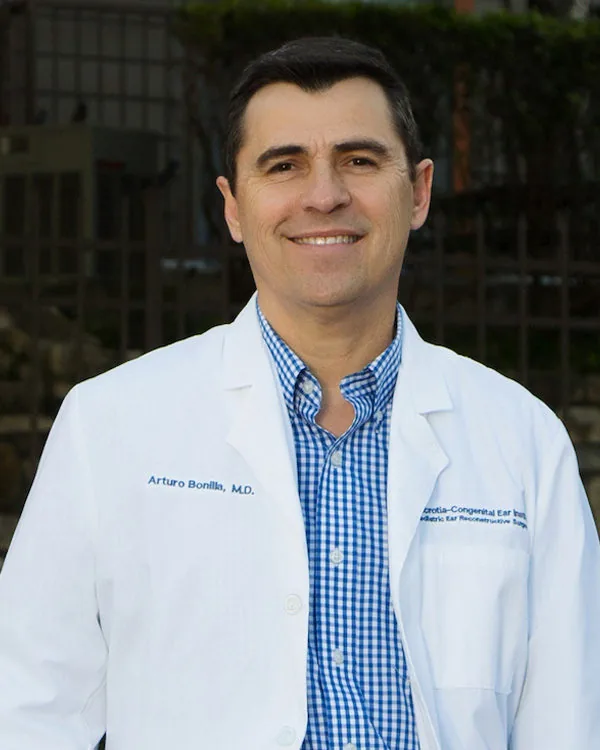
Medically reviewed by Arturo Bonilla, MD — August 2026
Why do 9 in 10 microtia surgeons worldwide choose rib cartilage?
It is the patient’s own living tissue. It grows with the child, cannot be rejected, flexes under impact, and requires no replacement — ever.
Medpor/Su-Por is done in one session — but that session typically requires 7–10+ hours of anesthesia (longer than Dr. Bonilla’s entire surgeries combined) and can often require another visit for revision or repair of fracture or exposure.
Source: Facial Plastic Surgery Clinics of North America — global survey of microtia surgical technique preference. Dr. Bonilla is principal author. PMID: 29153189
Why Natural Rib Cartilage — The Clinical Rationale
Dr. Bonilla uses only one technique: the patient's own rib cartilage, harvested and sculpted by hand into a three-dimensional ear framework. This is not one option among several he offers for microtia treatment — it is the technique he has refined through more than 30 years of exclusive practice. Families who want a broader understanding of microtia and its treatment approach before exploring the surgical details will find a complete overview on the main microtia page.
The reasoning is biological. Rib cartilage is living tissue. Once transplanted, it integrates with the surrounding tissue, receives blood supply, and — critically — grows with the child. A framework placed at age six will still be present, proportionate, and intact when that child is sixty. It bends under impact rather than fracturing. It cannot be rejected by the body. It requires no replacement. No synthetic material comes close to replicating these properties over a lifetime.
The alternative — polyethylene (Medpor/Su-Por) implants — can be performed on younger children and requires slightly less surgical time. But the trade-off is permanent: a foreign material that cannot grow, can fracture, can expose through the skin, and may require replacement with a smaller implant if problems arise years later. Dr. Bonilla does not use Medpor/Su-Por as the ear reconstruction framework, and he will explain his reasoning in full at your consultation.
The rib cartilage technique does require more from the surgeon — more hours, more anatomical precision, more hand-sculpting skill. It is harder to do well. That is precisely why the concentration of experience matters. Before your consultation, Dr. Bonilla’s guide on how to think about microtia surgery addresses the decisions families face and how to approach them with clarity. View Dr. Bonilla's published research and clinical record →
What Dr. Bonilla tells every family about microtia surgery →
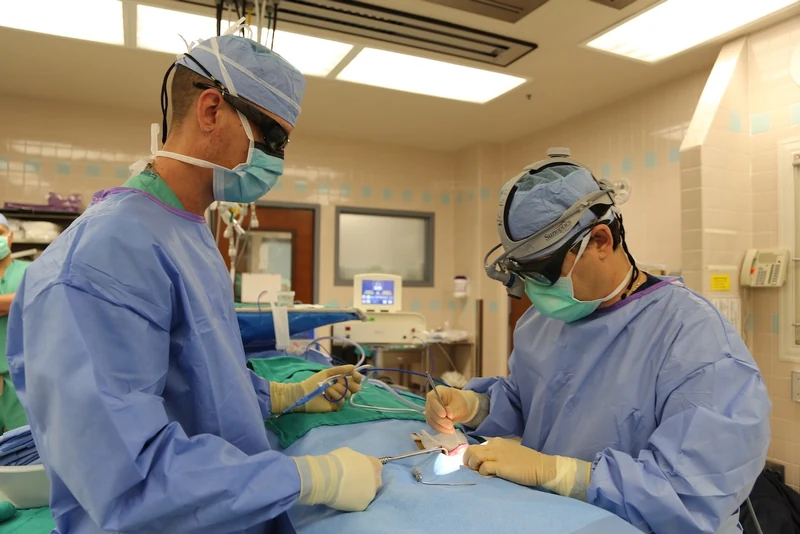
When is the right time — and what makes a child ready?
Surgery cannot happen the moment a family wants it to. The child's body must be ready — specifically, the rib cartilage must have grown enough to provide sufficient material for a complete ear framework. This is not a long wait. Most children are ready between ages six and nine.
Grade II Microtia — Single-Stage Reconstruction
For eligible Grade II microtia patients, Dr. Bonilla completes the entire reconstruction in a single surgical stage using the patient's own natural rib cartilage.
Dr. Bonilla demonstrates the natural flexibility of a reconstructed ear — something no synthetic implant can ever achieve.
One of the most persistent misconceptions in microtia care is that rib cartilage reconstruction always requires multiple surgeries spread over years. For Grade II microtia patients this is simply not true. Dr. Bonilla routinely completes the entire ear reconstruction in a single surgery averaging three hours — using the patient's own natural rib cartilage to build a permanent, flexible, living ear that grows with your child for life.
The overwhelming majority of microtia surgeons worldwide — approximately 91.3%¹ — prefer natural rib cartilage reconstruction over synthetic implants. There is a reason for this global consensus: natural tissue lasts a lifetime, grows with the child, flexes like a real ear, and carries none of the permanent risks associated with synthetic implants.
“When I flex this ear you can see it moves exactly like a natural ear. That is because it is natural tissue — the patient's own rib cartilage grown from their own body. No synthetic implant can ever do this.”
Grade II microtia is the ideal candidate for single-stage reconstruction. If your child has been diagnosed with Grade II microtia, Dr. Bonilla will likely be able to perform a single-stage rib cartilage reconstruction — something that can be discussed in detail during your consultation.
Single-Stage Rib Cartilage vs. Synthetic Implant — The Facts
| Dr. Bonilla One-Stage Rib |
Medpor / SuPor Synthetic Implant |
|
|---|---|---|
| Surgery Time | ~3 hours | 7–10+ hours |
| Number of Stages | 1 | 1–2 (depending if revision is needed for fracture or unhealed exposure) |
| Material | Patient’s own natural tissue | Synthetic implant (polyethylene) |
| Grows With Child | Yes — natural tissue grows | No — plastic never grows |
| Flexibility | Flexes like a real ear | Rigid for life |
| Lifetime Fracture Risk | None | Yes — permanent lifetime risk |
| Exposure Risk | None | Yes — permanent lifetime risk |
| Revision If Needed | Moderate difficulty | Extremely difficult |
| Sleeping Comfort | Soft natural tissue | Firm implant material |
| Preferred By Surgeons Worldwide | Approximately 91.3%¹ of microtia surgeons | Less than 2% of microtia surgeons |
| Permanent Result | Yes — with good post-operative care | Lifetime exposure and revision risk |
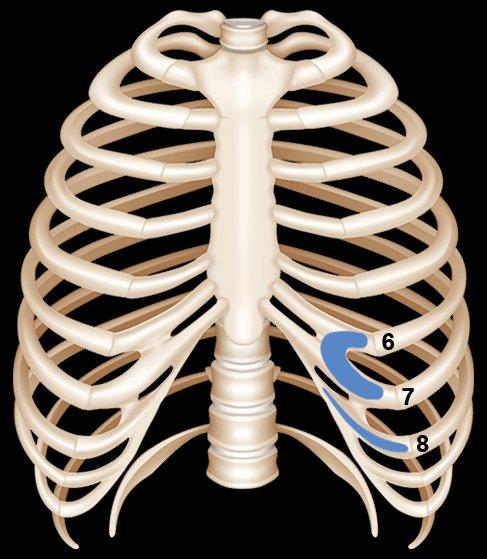
The anatomy of the harvest
The raw material for the ear comes from the patient's own rib cartilage — specifically from the 6th, 7th, and 8th ribs. The 6th and 7th ribs are typically fused and together form the base of the ear framework: the curved antihelix, the concha (the bowl), and the lower structural elements. The 8th rib — a floating rib — is used to form the helix, the outer rim of the ear that defines its distinctive curved shape.
The harvest incision is made on the opposite side of the chest from the affected ear — a deliberate choice that places the donor site scar where it is naturally less visible. On a six-year-old, this incision is typically about one inch in length, and it is placed obliquely along the natural lines of the skin to minimize long-term visibility. Three carefully sized pieces of cartilage are removed — just enough to build the ear, no more — and the incision is closed in layers.
The sculpting process — six structures in one
Dr. Bonilla takes the three pieces of harvested cartilage and carves them, by hand, into the six anatomical structures that define a recognizable ear: the helix, antihelix, tragus, antitragus, concha, and scapha. No two ears are identical — each framework is sculpted specifically to match the dimensions of the patient's own opposite ear, measured precisely during the procedure.
The cartilage pieces are shaped with surgical instruments, then wired together into a single three-dimensional structure. The completed framework is surprisingly detailed — every ridge and depression that makes an ear look natural is present in the cartilage before it ever enters the body. What the skin does is reveal it.
Placement under the skin
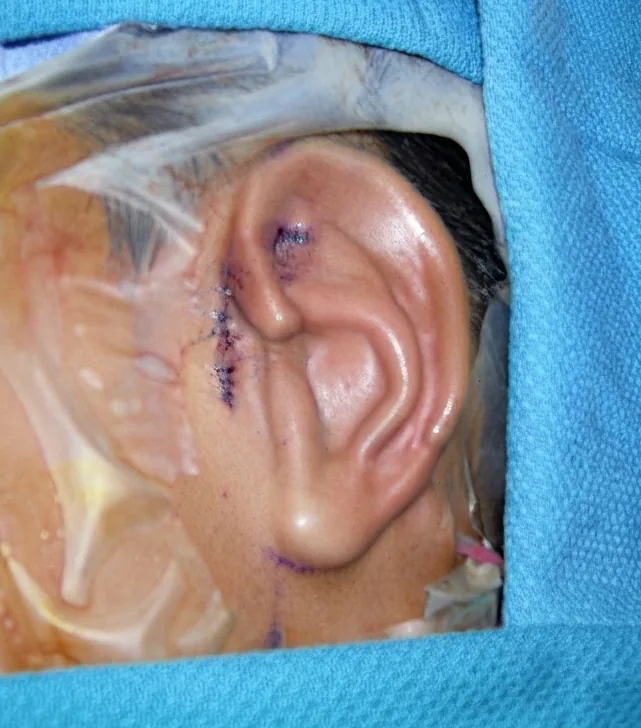
Once the cartilage framework is complete, Dr. Bonilla marks the precise location for the new ear on the side of the head — using the opposite ear's position as the reference point for height, angle, and relationship to the hairline. An incision is made and a pocket is created beneath the skin, exactly sized to receive the framework.
The cartilage framework is slid into the skin pocket and positioned precisely. A small drain is placed in the pocket — this allows the skin to vacuum tightly over every contour of the cartilage framework during the healing period. The drain is what causes the extraordinary three-dimensional detail that appears even in the first week after surgery — the skin is literally being pulled down into every groove and ridge carved into the cartilage.
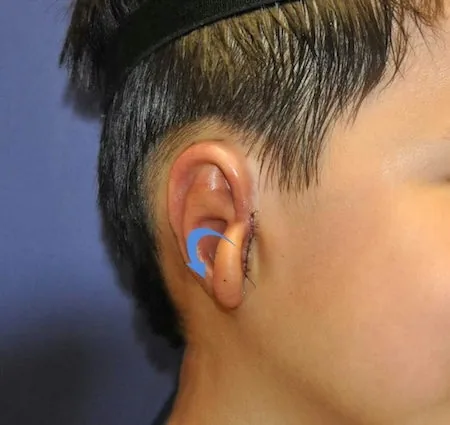
During this same surgery, the earlobe remnant is rotated into its final position, the tragus is formed, and the conchal bowl is deepened. At the end of Stage 1, the complete ear structure is present. Only the elevation away from the head remains for Stage 2.
What happens during this part of Stage 1
After the ear framework is placed during Stage 1, Dr. Bonilla completes the outer ear structure before the surgery ends. The earlobe (lobule) is rotated down to its proper position, the tragus is formed, and the conchal bowl is deepened.
These three steps are now completed as part of Stage 1 rather than during a separate operation.
What the ear looks like after Stage 1
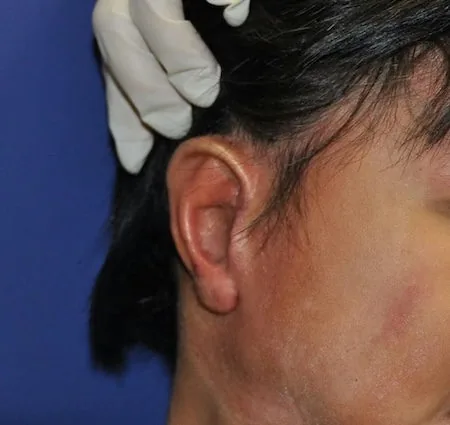
After Stage 1, the complete ear structure is present. It has an earlobe in the correct position, a formed tragus at the front, and a deepened concha that gives it three-dimensional depth. The ear still sits relatively flat against the head until Stage 2 creates its final projection.
The framework, earlobe, tragus, and concha are all completed in this first surgery. Only elevation remains.
Before and After Stage 2 — Elevation
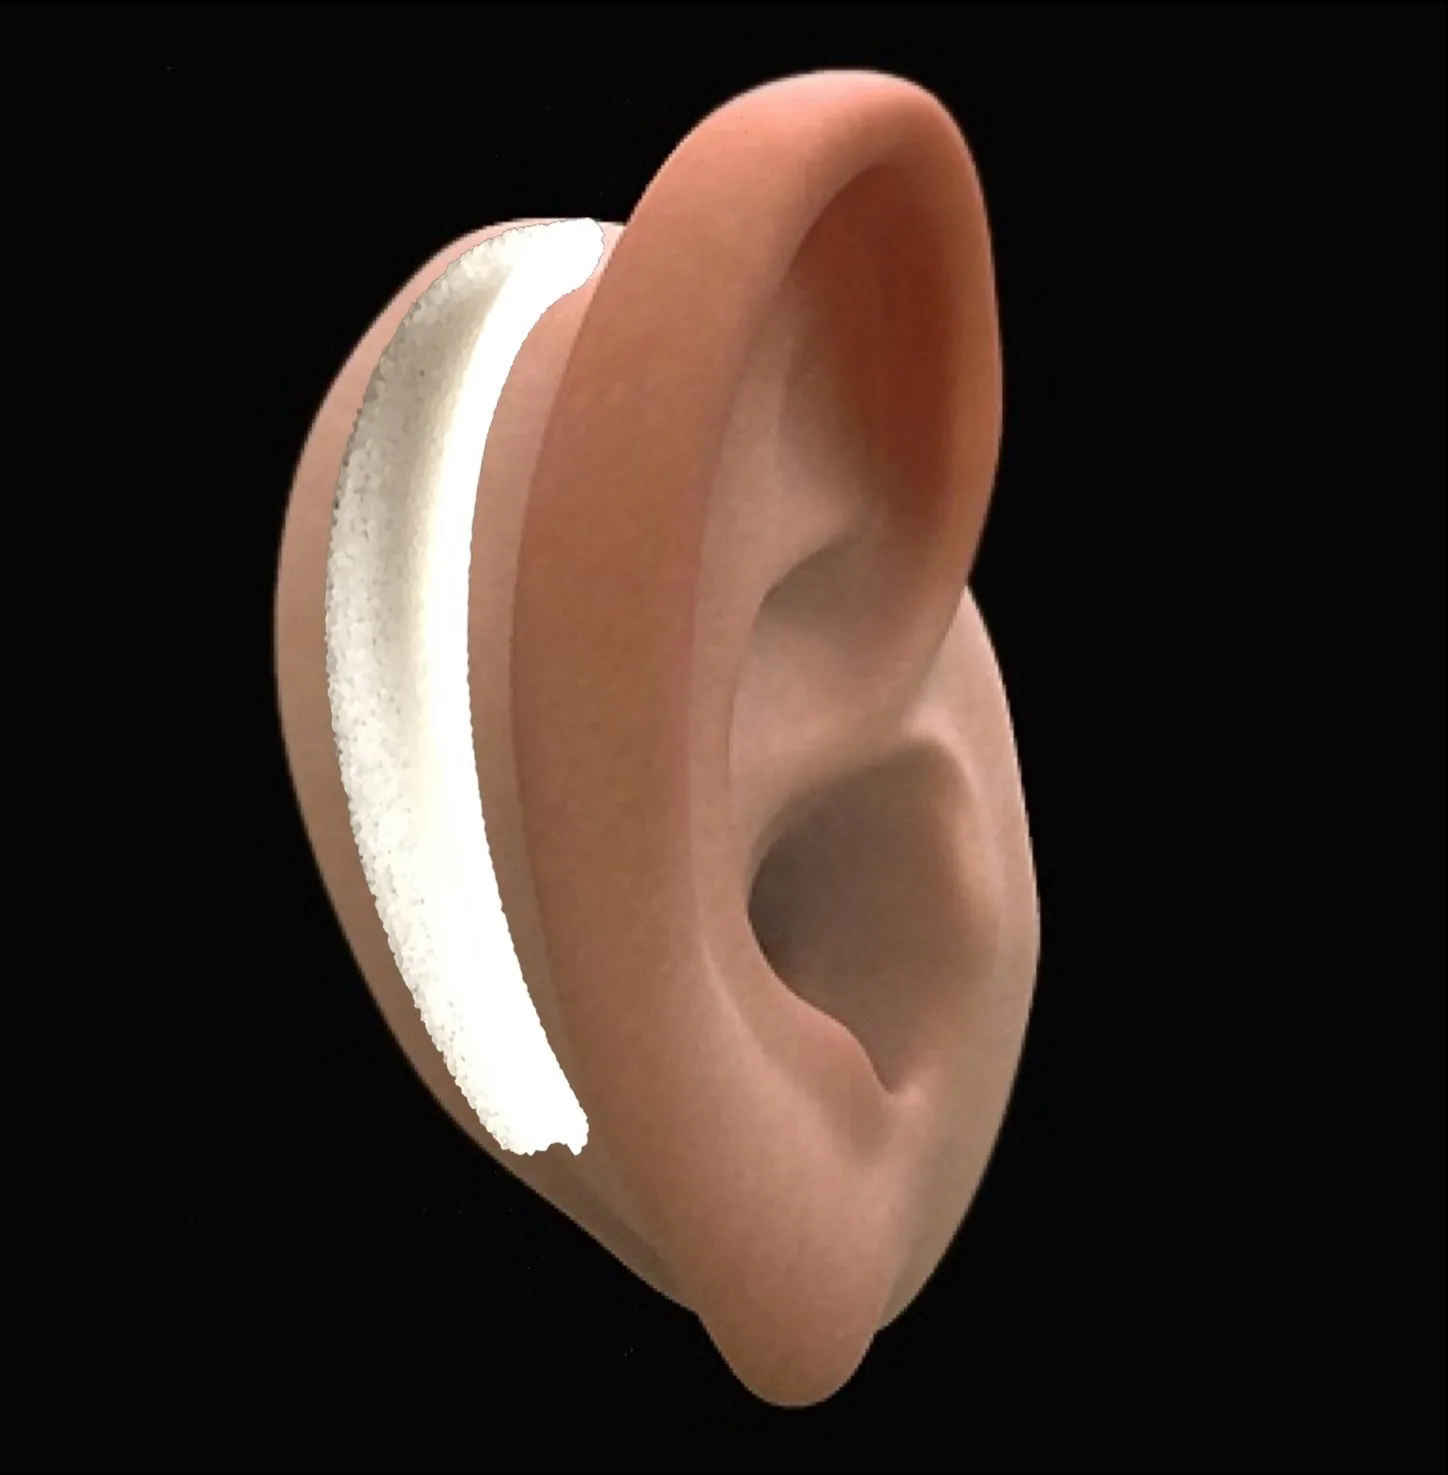
After Stage 1, the ear has its full anatomical structure — every cartilage detail, a correctly positioned earlobe, a formed tragus, and a deepened concha. It still sits flush against the side of the head. The natural ear typically projects away from the head at an angle of approximately 10–15 degrees. Dr. Bonilla matches projection to the opposite ear, with the Microtia Wedge allowing adjustment of the angle. In cases where the opposite ear protrudes significantly, a slight adjustment of the opposite ear may be considered to support symmetry.
Stage 2 is the elevation procedure. The reconstructed ear is carefully separated from the scalp, and the space created behind it is filled and maintained with two elements: a skin graft placed on the raw surface behind the ear, and a small wedge of polyethylene positioned behind the cartilage to support the angle of projection permanently. The visible outer surface of the ear remains covered entirely by the patient's own local skin.
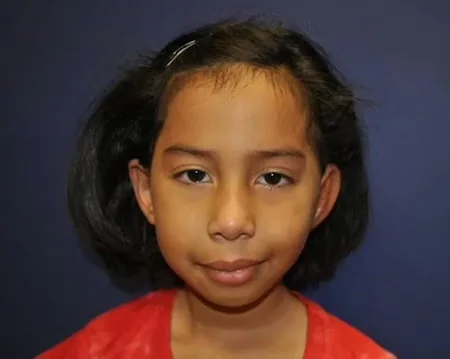
After Stage 2 — the result
When Stage 2 has healed, the reconstruction is complete. The ear projects naturally from the head, matches its opposite in size and angle, has three-dimensional detail across its surface, and is composed of living tissue that will continue to mature with the patient.
There is no color difference on the visible ear — the front surface is covered entirely with the patient's own local skin. There is no risk of fracture from normal activity. The ear bends naturally on contact. It looks, feels, and behaves like the ear that nature would have built — because it is made of the same material.
Dr. Bonilla’s goal is a result that reads as natural from a conversational distance. Long-term follow-up visits indicate this is achieved in the large majority of cases.
Long-Term Outcomes of Rib Cartilage Reconstruction
The children who were Dr. Bonilla's first patients in the late 1990s are adults in their thirties now. Their ears grew with them, are intact, and closely resemble natural ears. This is the evidence base for why the technique matters — not just the immediate result, but what it produces over time.
Questions parents ask most often about the surgery
These are the questions Dr. Bonilla hears in every consultation. None of them have bad answers.
It’s a reasonable question. Synthetic implant surgery such as Medpor or SuPor typically takes between 7 and 10 hours in a single session. Dr. Bonilla's natural rib cartilage reconstruction creates the complete ear in one or two surgeries: Grade II is completed in one stage, while Grade III, Grade IV, and other grades requiring full reconstruction are completed in two stages over approximately 2 months.
The overwhelming majority of microtia surgeons worldwide — approximately 91.3%¹ — prefer natural rib cartilage reconstruction over synthetic implants. This global consensus exists for important reasons.
First — natural rib cartilage is the patient's own living tissue. It grows with the child, flexes naturally like a real ear, and carries no lifetime risk of implant fracture or exposure.
Second — synthetic implants require a temporoparietal fascia flap to cover the implant. This is an invasive procedure that involves the rotation of a vascular flap under the scalp and carries its own risks — including hair loss at the donor site and possible damage to branches of the facial nerve. Families should understand that any microtia surgery — regardless of technique — is an invasive procedure. The relevant question is not whether surgery is invasive, but what the long-term outcomes and risks of each approach look like over a lifetime. A child who receives rib cartilage reconstruction carries living tissue that grows with them, requires no maintenance, and carries no lifetime implant risk. While rib cartilage is slightly firmer than a natural ear and does not bend with exactly the same ease, it is living tissue that integrates naturally with the body. A child who receives a synthetic implant carries a permanent foreign body that does not grow with them and requires lifelong awareness of the risks of exposure, fracture from trauma, and loss of sensation — any of which may require additional surgery at any point in their life.
Third — if a complication occurs with a synthetic implant, revision is among the most technically challenging procedures in reconstructive surgery. The temporoparietal fascia flap required to cover the implant is permanently consumed — and its scarring destroys the skin elasticity required for natural reconstruction. Cartilage reconstruction should always be pursued first. If a cartilage reconstruction requires additional work, the surgeon is still operating in a preserved tissue environment. If a synthetic implant is placed first and complications arise, the path to natural reconstruction may be permanently closed.
Recovery from rib cartilage reconstruction is well tolerated. Most patients rate their discomfort 1 to 2 out of 10 in the first 24 hours, require pain medication for approximately 2 days, and return to near normal activity within 3 to 4 days — results that speak to the precision and minimally disruptive nature of Dr. Bonilla's surgical technique.
The decision between surgical approaches is deeply personal and Dr. Bonilla encourages every family to ask detailed questions and gather complete information before making any decision. A consultation with Dr. Bonilla is the best way to understand which approach is right for your child specifically.
Most parents are surprised by how little pain their child experiences. Children recover remarkably well from rib cartilage surgery — the majority require little to no pain medication after their first night in the hospital, and most manage the first week at home with over-the-counter pain relief. The chest site (where the cartilage was harvested) is typically no more uncomfortable than the ear site. Pain levels are consistently reported as lower than families anticipated.
The chest incision is approximately one inch long and is placed obliquely along natural skin tension lines to minimize scarring. In children, scars from well-placed incisions tend to fade significantly — most are barely visible within a year or two. The harvested cartilage represents a small fraction of total rib volume; the chest wall integrity is fully maintained and there is no impact on breathing, posture, or thoracic function.
Dr. Bonilla uses the opposite ear as the direct template for every reconstruction — measuring its exact height, width, projection angle, and the position of each anatomical landmark. The cartilage framework is sculpted to match these measurements specifically. In skilled hands with sufficient volume of experience, the match is very close. It will not be identical — no two natural ears are identical either — but the reconstruction will be proportionate, symmetrical from a normal viewing distance, and anatomically detailed. Photos of Dr. Bonilla's results are available at your consultation.
Grade II reconstruction is completed in one stage. Grades III, IV, and other grades requiring full reconstruction are completed in two stages spaced approximately two months apart.
The outer ear reconstruction rebuilds the visible external ear but does not itself restore hearing. Hearing improvement requires addressing the ear canal separately. Atresiaplasty may be an option for candidates with favorable middle ear anatomy. For others, a bone-anchored hearing aid can be implanted during Stage 2.
In cases where a minor surface refinement would improve an otherwise successful result — a small adjustment to the helical rim, a detail of the antihelix — a limited additional procedure is sometimes performed. This is different from major revision after complications such as infection or significant cartilage resorption, which are technically complex situations. The more important point is this: with natural rib cartilage, the tissue environment is preserved, and options remain open. If a synthetic implant is placed first and a complication arises, the scarring from the fascia flap destroys the skin elasticity required for natural reconstruction — potentially closing that option permanently. The vast majority of Dr. Bonilla’s reconstructions are completed within the defined stages without any additional procedures.
This is one of the most important questions a parent can ask, and the answer is the core reason Dr. Bonilla uses rib cartilage exclusively. Because the framework is living tissue, it grows in proportion with the child's face through adolescence and into adulthood. Dr. Bonilla's early patients — children operated on in the late 1990s — are now adults in their thirties. Their reconstructed ears are intact, proportionate, and closely resemble natural ears. This 30-year clinical track record is the evidence base for the technique.
Request a Consultation
A consultation with Dr. Bonilla provides a complete assessment of your child’s candidacy, surgical timing, and expected results — tailored to their specific anatomy and grade. Telehealth consultations available.